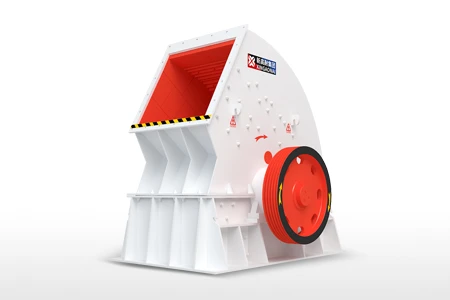
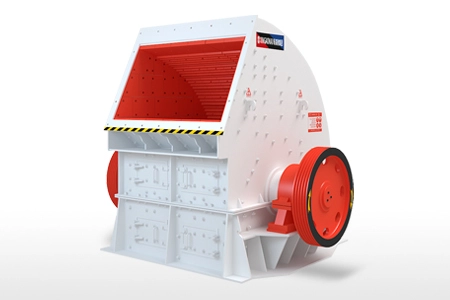
Regular hammer crusher maintenance helps prevent unexpected shutdowns, maintain consistent output, reduce wear-part consumption and extend equipment service life.
A heavy-duty hammer crusher operates under repeated impact, vibration and dust. Its hammers, rotor, bearings, liners, drive system and discharge components are therefore exposed to continuous mechanical stress.
This guide provides practical daily, weekly, monthly and shutdown maintenance procedures for a heavy hammer crusher. It also explains how to recognize common warning signs and determine when hammers and other wear parts should be replaced.
The recommended intervals are general guidelines. Always adjust the schedule according to the operating manual, material abrasiveness, moisture content, daily working hours and actual inspection data.
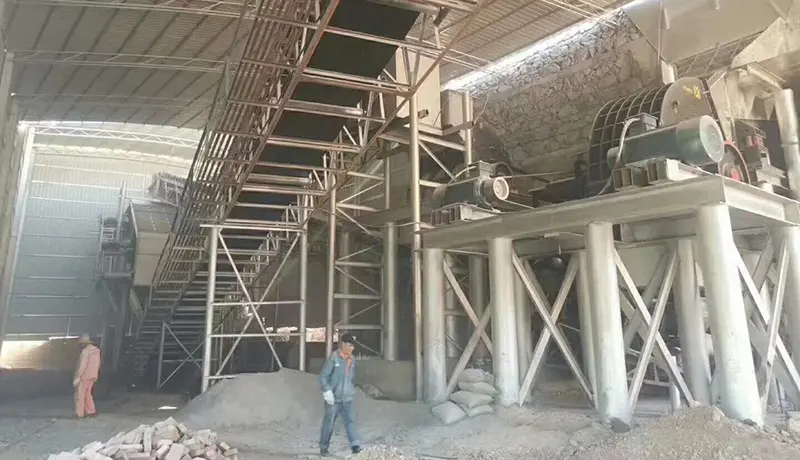
Why Hammer Crusher Maintenance Matters
Hammer crushers use high-speed impact to break material. During operation, the rotor, hammer heads, pins, bearings and liners are repeatedly exposed to impact loads.
Without a preventive maintenance plan, small problems can develop into major failures.
Regular maintenance helps achieve:
Stable crushing capacity
Consistent discharge size
Lower vibration
Reduced bearing temperature
Longer hammer and liner life
Lower power consumption
Fewer emergency shutdowns
Better workplace safety
More predictable spare-parts costs
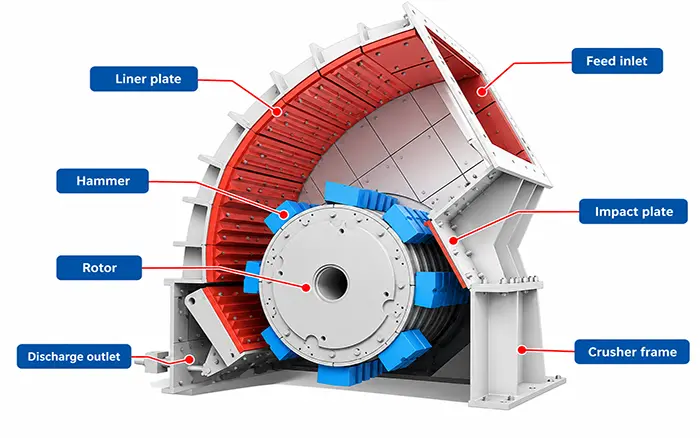
Operators should understand what a hammer crusher is and how it works before performing inspections. Knowing the material flow and component functions makes it easier to identify abnormal operating conditions.
Safety Before Maintenance
Never inspect or repair the crusher while the rotor is moving or while the drive system remains energized.
Before opening an inspection door or entering the crushing chamber:
Stop the feed system.
Allow all material to leave the crusher.
Shut down the crusher and drive motor.
Isolate the electrical power supply.
Apply the required lockout/tagout procedure.
Release stored mechanical, hydraulic or pneumatic energy.
Confirm that the rotor has completely stopped.
Secure the rotor against accidental movement.
Use suitable lifting equipment for heavy components.
Wear the required personal protective equipment.
Never rely only on the control-panel stop button. Maintenance should begin only after the machine has been properly isolated and verified.
Hammer Crusher Maintenance Schedule
The following schedule can be used as a general preventive maintenance framework.
| Interval | Main inspection items |
|---|---|
| Before every shift | Guards, bolts, lubrication, belts, chamber condition and safety devices |
| During operation | Vibration, bearing temperature, motor current, noise, feed and discharge |
| After every shift | Material buildup, leaks, loose parts and operating records |
| Weekly | Hammers, liners, pins, drive belts, fasteners and discharge components |
| Monthly | Rotor condition, shaft alignment, bearing condition and measured wear |
| Quarterly or planned shutdown | Rotor balance, structural cracks, bearing clearances and major wear parts |
| After replacing hammers | Hammer weight matching, rotor balance, clearances and no-load test |
Inspection frequency should be increased when processing abrasive material, wet feed or material with an inconsistent feed size.
Daily Hammer Crusher Maintenance Checklist
Daily inspection is the foundation of reliable crusher operation.
Before Starting the Crusher
Complete the following checks before each shift:
Make sure all guards and inspection doors are closed.
Check foundation bolts and visible fasteners.
Inspect the drive belts for cracks, wear and incorrect tension.
Check bearing lubrication levels and visible lubricant leaks.
Remove accumulated material from the feed and discharge areas.
Confirm that the crushing chamber does not contain tools or foreign objects.
Inspect electrical cables, sensors and emergency-stop devices.
Confirm that the downstream conveyor is ready to operate.
Check that the feed material is within the permitted size range.
Verify that magnets or metal-removal devices are functioning, if installed.
Do not add lubricant automatically simply because the bearing feels warm. Incorrect lubricant, excessive grease and contaminated oil can also cause overheating.
During Operation
Monitor and record:
Bearing temperature
Motor current
Crusher vibration
Abnormal impact or metal-contact noise
Feed rate
Discharge flow
Product size
Dust leakage
Belt condition
Material buildup
Compare these readings with the machine’s normal operating baseline. A sudden change is usually more important than an isolated reading.
For example, a gradual increase in bearing temperature may indicate lubrication deterioration, contamination, misalignment or increasing bearing wear.
After the Shift
After shutdown and isolation:
Clean material from the feed and discharge areas.
Check for loose bolts or visible cracks.
Inspect for oil or grease leakage.
Record abnormal noise, temperature or vibration.
Check whether the product became coarser during the shift.
Report damaged guards or safety devices.
Record maintenance work in the equipment log.
Weekly Maintenance Tasks
Weekly maintenance should focus on wear components and mechanical connections.
Inspect the Hammer Heads
Check each hammer for:
Uneven wear
Excessive rounding
Cracks
Chipped edges
Deformation
Loose mounting
Different wear levels across the rotor width
Uneven hammer wear may indicate uneven feeding, rotor imbalance, incorrect installation or inconsistent feed material.
Inspect Hammer Pins and Retaining Components
Check pins, locking devices, retaining plates and related fasteners for wear or movement.
A loose hammer pin can damage the rotor disc and create dangerous vibration.
Inspect Liners and Impact Surfaces
Look for:
Excessive liner thinning
Loose liner bolts
Cracks
Missing sections
Polished areas indicating concentrated impact
Wear exposing the crusher housing
Replace damaged liners before the crusher body is exposed to direct impact.
Check Discharge Components
Depending on the crusher design, inspect:
Grate bars
Discharge openings
Adjustable discharge components
Guide plates
Material channels
Not every hammer crusher uses grate bars. Some XINGAONAI hammer crushers use a grate-free design to reduce blockage and improve the handling of wet material.
Check the Drive System
Inspect:
Belt tension
Belt wear
Pulley alignment
Coupling condition
Motor mounting bolts
Protective guards
Unequal belt tension can create vibration and increase the load on bearings and the motor.
Monthly Maintenance Tasks
Monthly maintenance should include measurements rather than visual checks alone.
Measure Hammer Wear
Record hammer dimensions at consistent measuring points. Compare the results with previous inspections to calculate the wear rate.
Replace hammers when:
They reach the manufacturer’s minimum permitted dimensions or weight.
Cracks or major chips are visible.
Wear is significantly different between hammers.
Crushing capacity decreases.
The product becomes consistently too coarse.
Vibration remains high after other causes are eliminated.
There is no universal replacement interval. Hammer life depends on material hardness, abrasiveness, moisture, feed distribution, rotor speed and hammer material.
See the detailed hammer crusher wear parts guide for information about hammer materials, wear patterns and replacement planning.
Check the Rotor Assembly
Inspect:
Rotor discs
Hammer pins
Spacers
Main shaft
Retaining components
Welding areas
Evidence of material buildup
Material attached to one side of the rotor can create imbalance even when the hammers are in good condition.
Inspect Bearings
Check for:
Abnormal temperature
Unusual noise
Excessive vibration
Lubricant leakage
Contaminated grease or oil
Damaged seals
Excessive bearing clearance
Bearings should be inspected according to condition and operating hours. Replacing bearings solely according to calendar time may result in unnecessary cost, while ignoring condition data may lead to unexpected failure.
Check Shaft and Drive Alignment
Misalignment can produce:
Uneven belt wear
Bearing overheating
Coupling damage
Increased vibration
Higher power consumption
Alignment should be checked after bearing replacement, motor movement, rotor work or any significant vibration event.
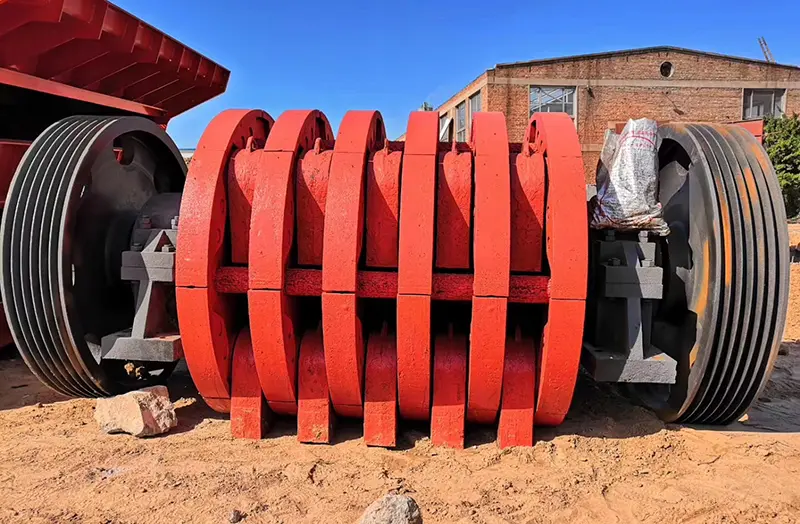
Hammer Replacement Procedure
Hammer replacement must preserve rotor balance.
When Replacing Hammers
Follow these principles:
Record the position of every hammer before removal.
Clean the rotor and mounting points.
Inspect hammer pins and rotor holes.
Weigh or match replacement hammers.
Replace hammers in balanced pairs or balanced groups.
Maintain the correct arrangement across the rotor.
Check the hammer-to-liner and hammer-to-discharge clearance.
Tighten and secure all retaining components.
Rotate the rotor manually when permitted by the manufacturer.
Perform a controlled no-load test before feeding material.
Do not install one new hammer opposite a heavily worn hammer. The weight difference can produce rotor imbalance, high vibration and bearing damage.
For component names and functions, refer to hammer crusher parts.
Lubrication and Bearing Maintenance
Lubrication reduces friction, carries heat away from bearing surfaces and protects components from contamination.
Use the Correct Lubricant
Use only the lubricant grade specified for the machine and operating environment.
Consider:
Bearing speed
Operating temperature
Ambient temperature
Dust level
Moisture exposure
Lubrication system type
Mixing incompatible grease types can reduce lubrication performance.
Avoid Overgreasing
Too much grease can increase churning resistance and bearing temperature. It may also damage seals and allow contamination to enter.
Apply the specified quantity at the correct interval.
Keep Lubrication Clean
Dust, water and crushed material can severely shorten bearing life.
Use clean tools and sealed containers when adding grease or oil. Clean the lubrication point before connecting the grease gun.
Monitor Temperature Trends
A bearing temperature increase may be caused by:
Insufficient lubrication
Excessive lubrication
Incorrect lubricant
Contamination
Damaged seals
Misalignment
Excessive belt tension
Bearing wear
Rotor imbalance
Do not assume every overheating problem can be solved by adding grease.
Rotor Balance and Vibration Control
Excessive vibration should never be considered normal simply because the crusher handles impact loads.
Common causes include:
Unevenly worn hammers
Incorrect hammer arrangement
Material buildup on the rotor
Loose foundation bolts
Damaged bearings
Bent hammer pins
Shaft deformation
Misaligned pulleys or couplings
Uneven feeding
Loose liners
Cracked rotor components
If vibration increases suddenly, stop the crusher and inspect it before restarting.
When hammers are replaced, their weights should be matched according to the manufacturer’s tolerance. After assembly, check rotor balance and perform a no-load test.
Common Hammer Crusher Problems and Solutions
| Problem | Possible causes | Recommended checks |
|---|---|---|
| Excessive vibration | Uneven hammer wear, loose bolts, rotor buildup, bearing damage | Stop the crusher, inspect hammer arrangement, clean the rotor and check bearings |
| Bearing overheating | Wrong lubrication, overgreasing, contamination, belt tension or misalignment | Check lubricant, seals, alignment and bearing condition |
| Low capacity | Worn hammers, blocked discharge, uneven feeding or wet material | Inspect wear parts, discharge area and feed system |
| Coarse product | Worn hammers, excessive clearance or high feed rate | Measure hammer wear, check discharge setting and reduce overfeeding |
| Excessive fines | Rotor speed too high, repeated crushing or unsuitable discharge setting | Check speed, discharge configuration and feed distribution |
| Chamber blockage | Wet or sticky material, oversized feed or restricted discharge | Stop and isolate the machine, clear the blockage and correct the feed |
| High motor current | Overfeeding, blocked discharge, bearing resistance or foreign material | Stop feeding, check the chamber, bearings and motor load |
| Metal impact noise | Loose liner, broken hammer, foreign metal or damaged retaining component | Stop immediately and inspect the crushing chamber |
| Uneven hammer wear | Feed concentrated on one side or incorrect hammer arrangement | Improve feed distribution and verify rotor configuration |
| Dust leakage | Damaged seals, loose covers or poor dust extraction | Inspect sealing points and dust-control equipment |
Do not continue operating when there is severe vibration, sudden temperature rise or repeated metal-contact noise. Continuing production may turn a replaceable wear-part problem into rotor, shaft or housing damage.
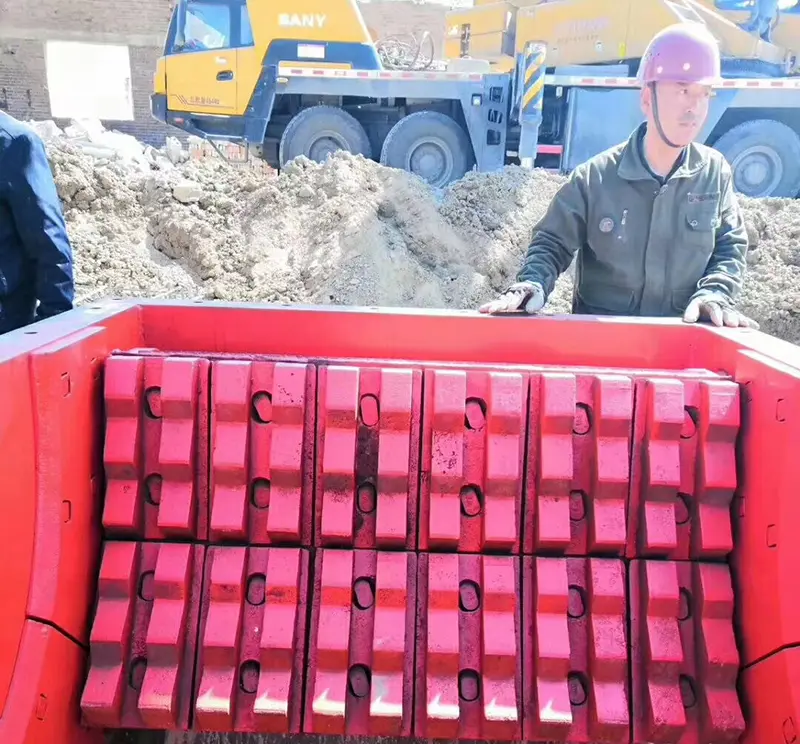
How Feed Conditions Affect Maintenance
Maintenance requirements are closely related to the feed material.
Abrasive Material
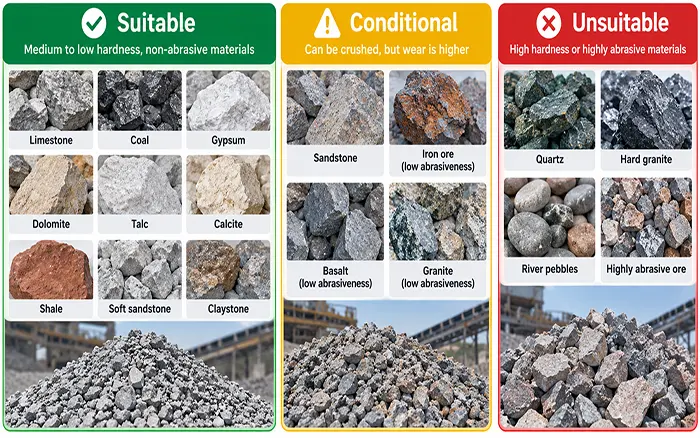
Quartz-rich or abrasive material accelerates hammer and liner wear. Inspection intervals should be shortened, and wear rates should be recorded.
Wet or Sticky Material
Wet material may accumulate in the chamber or restrict the discharge area. A grate-free design can reduce certain blockage risks, but regular inspection is still required.
Oversized Feed
Feed larger than the specified maximum size can cause:
Severe impact loads
Hammer damage
Blockage
High motor current
Unstable capacity
Metal Contamination
Tramp metal can damage hammers, pins, liners and rotor components. Use magnetic separators or metal detectors where appropriate.
Review what materials a heavy hammer crusher can crush before processing a new material.
Recommended Spare Parts Inventory
Keeping essential components in stock reduces shutdown time.
A practical spare-parts inventory may include:
Balanced hammer sets
Hammer pins
Retaining devices
Side liners
Impact or breaker plates
Discharge components
Bearings
Bearing seals
Drive belts
Coupling elements
Foundation and liner bolts
Approved lubricant
Temperature and vibration sensors
Inventory quantities should be based on delivery time, operating hours, measured wear rate and the importance of the crusher to the production line.
Maintenance Records to Keep
A maintenance log should record:
Operating hours
Feed material
Feed moisture
Daily capacity
Motor current
Bearing temperature
Vibration readings
Product size
Hammer measurements
Liner measurements
Lubrication work
Replaced components
Failure causes
Corrective actions
Historical records make it easier to predict replacement dates and distinguish gradual wear from sudden mechanical problems.
Maintenance data can also be used to calculate the real cost per ton. Equipment price alone does not reflect the cost of wear parts, power consumption and production downtime. See the hammer crusher price and operating-cost guide for additional cost-planning information.
Conclusion
An effective hammer crusher maintenance program combines daily operating checks, scheduled wear measurements, proper lubrication, balanced hammer replacement and accurate maintenance records.
The most important warning signs are increasing vibration, rising bearing temperature, abnormal metal noise, declining capacity and changes in finished product size. Investigating these symptoms early can prevent costly damage to the rotor, shaft, bearings and crusher housing.
For large-feed and high-capacity crushing applications, view the XGN-Z Series heavy hammer crusher.
For smaller or lower-capacity applications, consider the XGN-Q Series light hammer crusher.