Jaw crushers are the backbone of mining, construction, and aggregate industries, responsible for primary crushing of hard materials like granite, limestone, and ore. If you’re tasked with answering “how to build a jaw crusher,” it’s crucial to follow a systematic approach that balances structural integrity, operational efficiency, and safety. This guide breaks down the entire process, from design planning to final testing, ensuring you build a reliable and high-performance jaw crusher.

1. Pre-Construction Preparation: Lay the Foundation for Success
Before diving into physical construction, thorough preparation is non-negotiable. This phase determines the crusher’s compatibility with your intended use and compliance with industry standards—key steps when learning how to build a jaw crusher.
1.1 Define Specifications & Design Parameters
Start by clarifying core requirements: What material will the crusher process? What is the desired feed size (e.g., 500mm max) and output size (e.g., 50mm)? What production capacity do you need (e.g., 100 tons per hour)? These details shape the crusher’s design, including the size of the jaw chamber, rotor speed, and power rating.
Use 3D modeling software (e.g., AutoCAD, SolidWorks) to draft the crusher’s structure. Focus on the toggle plate, eccentric shaft, and jaw plates—critical components that affect crushing efficiency. For reference, standard small-scale jaw crushers (5-10 TPH) typically have a jaw opening of 150x250mm, while industrial models (500+ TPH) may exceed 1200x1500mm.
1.2 Source High-Quality Materials & Components
The durability of a jaw crusher depends entirely on material selection. Key materials include:
Jaw Plates: Use high-manganese steel (Mn13 or Mn18) for wear resistance—these plates bear the brunt of crushing and need to withstand repeated impact.
Frame: Adopt Q345B low-alloy structural steel for the main frame; it offers high tensile strength to support heavy loads during operation.
Eccentric Shaft: Choose 42CrMo alloy steel, which is heat-treated to enhance hardness and fatigue resistance.
Bearings & Seals: Opt for branded bearings (e.g., SKF, Timken) and oil-resistant seals to prevent dust and debris from entering moving parts.
Verify material certifications (e.g., ISO 9001) to avoid substandard parts—this is a common pitfall when inexperienced builders tackle how to build a jaw crusher.
2. Core Component Assembly: Build the Crushing Mechanism
The jaw crusher’s functionality relies on the precise assembly of its core components. Follow these steps to ensure proper alignment and performance.
2.1 Assemble the Main Frame
Weld or bolt the frame components (top beam, side plates, base) according to the design blueprint. Ensure the frame is level and square—use a laser level to check for deviations (tolerance should be ≤0.5mm/m). A misaligned frame can cause uneven wear on jaw plates and reduce the crusher’s lifespan.
After assembly, reinforce weld joints with ultrasonic testing to detect hidden cracks. For large-scale crushers, anchor the frame to a concrete foundation using anchor bolts to absorb vibration during operation.
2.2 Install the Eccentric Shaft & Bearings
The eccentric shaft is the “heart” of the
jaw crusher, driving the movable jaw’s reciprocating motion. First, mount the bearings in the frame’s bearing seats, then carefully insert the eccentric shaft. Apply high-temperature grease to the bearings to ensure smooth rotation.
Use a dial indicator to measure the shaft’s runout—maximum allowable runout is 0.05mm. If deviations exist, adjust the bearings or replace the shaft to prevent abnormal vibration.
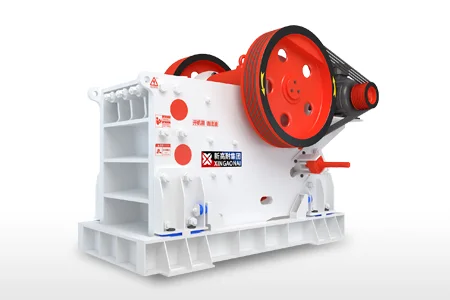
2.3 Attach Jaw Plates & Toggle Plate
Secure the fixed jaw plate to the frame using high-strength bolts, then attach the movable jaw plate to the swing jaw. Ensure both plates are aligned with the jaw chamber—gaps between the plates and frame should be filled with shims to avoid movement. The toggle plate, which connects the movable jaw to the frame, should be installed with a slight preload to maintain stability during crushing.
Adjust the gap between the fixed and movable jaw plates (discharge gap) based on your desired output size. For example, a 20mm gap produces fine aggregate, while a 50mm gap is suitable for coarse crushing.

3. System Integration: Add Power & Control Systems
Once the crushing mechanism is assembled, integrate the power, lubrication, and control systems to bring the jaw crusher to life.
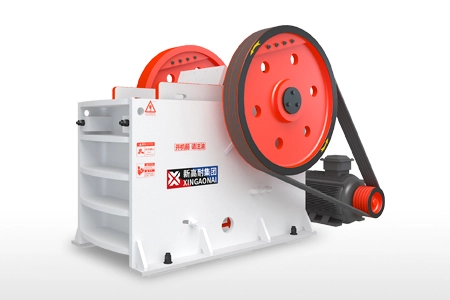
3.1 Install the Drive System
The drive system typically consists of a motor, V-belt, and pulley. Mount the motor on a adjustable base, then connect it to the eccentric shaft via V-belts. Ensure the belts are tensioned evenly—over-tensioning can damage bearings, while under-tensioning causes slippage and reduced power transfer.
Match the motor power to the crusher’s capacity: A 150x250mm crusher requires a 7.5kW motor, while a 1200x1500mm model needs a 160kW motor or larger.
3.2 Set Up Lubrication & Cooling Systems
Jaw crushers generate significant heat and friction, so a reliable lubrication system is essential. Install a centralized lubrication pump that delivers grease to the bearings, eccentric shaft, and toggle plate at regular intervals. For large crushers, add a cooling system (e.g., oil cooler) to keep lubricant temperature below 60°C.
Install level sensors and temperature alarms to monitor lubricant conditions—this prevents bearing failure, a leading cause of crusher downtime.
3.3 Integrate Safety & Control Features
Safety is paramount when learning how to build a jaw crusher. Add a metal detector to the feed hopper to prevent tramp metal (e.g., bolts, tools) from entering the crushing chamber—this avoids damage to jaw plates and the eccentric shaft.
Install an emergency stop button, overload protection, and a guard rail around moving parts. The control panel should display key metrics (e.g., motor current, bearing temperature, output rate) for real-time monitoring.
4. Testing & Calibration: Ensure Optimal Performance
Before putting the crusher into full operation, conduct rigorous testing to identify and resolve issues.
4.1 No-Load Test
Run the crusher without material for 2-4 hours. Check for abnormal noise, vibration, or overheating. Verify that the movable jaw moves smoothly and the lubrication system functions correctly. If bearing temperature exceeds 70°C, stop the test and adjust the grease amount or bearing alignment.
4.2 Load Test
Feed the crusher with the intended material (e.g., limestone) at the designed capacity. Monitor output size, production rate, and power consumption. Adjust the discharge gap if the output size is inconsistent—tighten the gap for finer material, loosen it for coarser output.
Run the load test for 8-12 hours to simulate continuous operation. Inspect jaw plates and bearings for wear—minor wear is normal, but excessive wear indicates misalignment or poor material quality.
5. Post-Construction: Maintenance & Longevity Tips
Building a jaw crusher is only the first step—proper maintenance ensures it operates reliably for years. Establish a maintenance schedule that includes:
Daily: Check lubricant levels, clean the feed hopper, and inspect guards.
Weekly: Tighten bolts on jaw plates and frame, replace worn seals.
Monthly: Inspect jaw plate wear, test safety alarms, and calibrate the control system.
Final Thoughts on How to Build a Jaw Crusher
Building a
jaw crusher requires careful planning, high-quality materials, and precise assembly. By following this step-by-step guide, you’ll create a crusher that meets your production needs while adhering to safety and efficiency standards. Remember, every detail—from material selection to calibration—impacts performance, so don’t cut corners. For complex industrial models, consider partnering with experienced manufacturers to ensure compliance with global industry regulations.